The following code opens an image from the disk, prints some image properties on the console and shows a window that contains the image.
# load and show an image in gray scale
image = cv.LoadImage('ariellek.jpg',cv.CV_LOAD_IMAGE_GRAYSCALE)

# print some image properties
print 'Depth:',image.depth,'# Channels:',image.nChannels
print 'Size:',image.width,image.height
print 'Pixel values average',cv.Avg(image)

# create the window
cv.NamedWindow('my window', cv.CV_WINDOW_AUTOSIZE)
cv.ShowImage('my window', image) # show the image
cv.WaitKey() # the window will be closed with a (any)key press
This is the image I used for this example.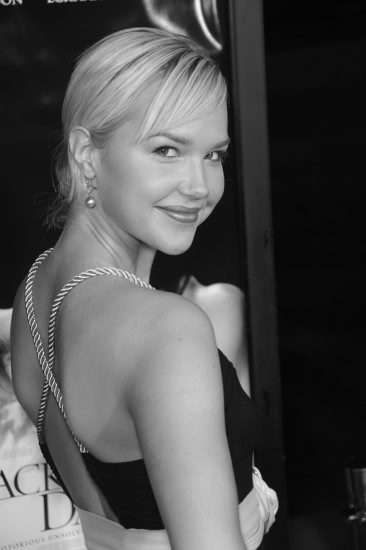
Depth: 8 # Channels: 1
Size: 366 550
Pixel values average (80.46735717834079, 0.0, 0.0, 0.0)
Now we can resize the image loaded above:
# resize the image
dst = cv.CreateImage((150,150), 8, 1)
cv.Resize(image,dst,interpolation=cv.CV_INTER_LINEAR)
cv.ShowImage('my window', dst)
cv.WaitKey()
cv.SaveImage('image2.jpg', dst) # save the image
And this is the result.
# Sobel operator
dstSobel = cv.CreateMat(image.height, image.width, cv.CV_32FC1)
cv.Sobel(image,dstSobel,1,1,3)
cv.ShowImage('my window', dstSobel)
cv.WaitKey()
cv.SaveImage('imageSobel.jpg', dstSobel)
And this is the result on the picture that I'm using:
# image smoothing and subtraction
imageBlur = cv.CreateImage(cv.GetSize(image), image.depth, image.nChannels)
# filering the original image
cv.Smooth(image, imageBlur, cv.CV_BLUR, 15, 15)
diff = cv.CreateImage(cv.GetSize(image), image.depth, image.nChannels)
# subtraction (original - filtered)
cv.AbsDiff(image,imageBlur,diff)
cv.ShowImage('my window', diff)
cv.WaitKey()
cv.SaveImage('imageDiff.jpg', diff)
The final output is:
Hey Giuseppe,
ReplyDeleteI'm a community leader at DZone.com and I was wondering if I could share some details about a program for quality developer blogs. Hit me up at mpron {at} dzone{dot}com.
when i try your code i have that error :
ReplyDelete'module' object has no attribute 'CreateImage'
How can i fix it?
on terminal :
Deletesudo apt-get install python-opencv
may fix this problem
There is something important to know about the cv library.
DeleteOpenCV 1.0's python api has the CreateImage function, and other related ones like CreateImage.
OpenCV 2 changed all that to use numpy arrays but kept the old api available for compatibility in the cv2.cv package.
Starting in OpenCV 3, the 1.x api has been removed. As of ubuntu 17.04/10 (idk) the python-opencv 2.x library is no longer available from APT or pip. Only 3.x is available unless you compile from source.
Do not write new programs using the old API, and if you want to make your old code work, look into converting your old CreateImage calls into numpy array creation and manipulation.
This comment has been removed by the author.
DeleteThis is pretty cool work ... Thank you very much,, I got my first python opencv program running.
ReplyDeletethank you!! i'm starting with openCV AND python AND raspberry pi, and this was a very cool introduction.
ReplyDelete